One of my passions in life is interior decorating, especially redecorating. And what I am even more passionate about is redecorating a room without spending a ton of money, so that's what prompted me to tackle the DIY Brass Light Strip Fixture project. In an effort to update my master bathroom without having to makeover the whole bathroom, I decided that one of the first things I needed to do was somehow make the vanity light look like a new light fixture. In this case, the light in our bathroom was a brass Hollywood strip light fixture. It was not a particularly old fixture and there was not really anything wrong with it.
Along with wanting to stick to a budget, I am a bit of a lazy DIYer and am all about figuring out how to improve things the easy way. Sometimes I fail and end up spending more time, money, and effort than if I would have just bought something new. But the good news is I scored a win with this DIY project.
Updating it was so incredibly easy I wish I would have done it a long time ago. All it took was a little bit of effort and a couple of coats of spray paint and ended up with a bathroom light fixture that looks quite nice and fits in with my white trim and minimal décor.
The instructions are super easy to follow. So if you have bathroom light fixtures that you want to update, check out my easy DIY instructions below.

NOTE: This project can be completed in a day. It is best to work outside on a sunny day that is not too windy. If you can not work outside, make sure you are in a well-ventilated area.
INSTRUCTIONS
- The first thing I did was to remove all of the light bulbs while the fixture was still on the wall.
- Then I pulled the collars off. (The pieces that fit around the bulbs)
- Next I pulled the whole brass metal fixture off of the wall. (It's the long strip)
- Taking the brass strip and collars outside, I gave them a light sanding with 320 grit sandpaper.
- I strung the brass strip under our deck with some fishing line (I tend to figure out the oddest way to do something). A typical way to get the piece positioned for spray painting would be laying it on an old table or across a chair. (Make sure whatever you prop it against can get spray paint on it.)
- For the collars, I spread some newspaper out on the ground and lay the collars on top, or you could use an old table.
- I then proceeded to spray the fixture and collars with a can of white primer paint.
- Going over it a few times to make sure it has good coverage but not so much that it would be too thick.
- I waited for the primer to dry for a few hours and after it was dry I opted not to sand because I knew the fixture wouldn't be getting any wear and tear just hanging on the bathroom wall.
- Then I sprayed the fixture and collars with a few light coats of white spray paint.
- I allowed the fixture and collars to dry for a few more hours and then I put everything back into place.
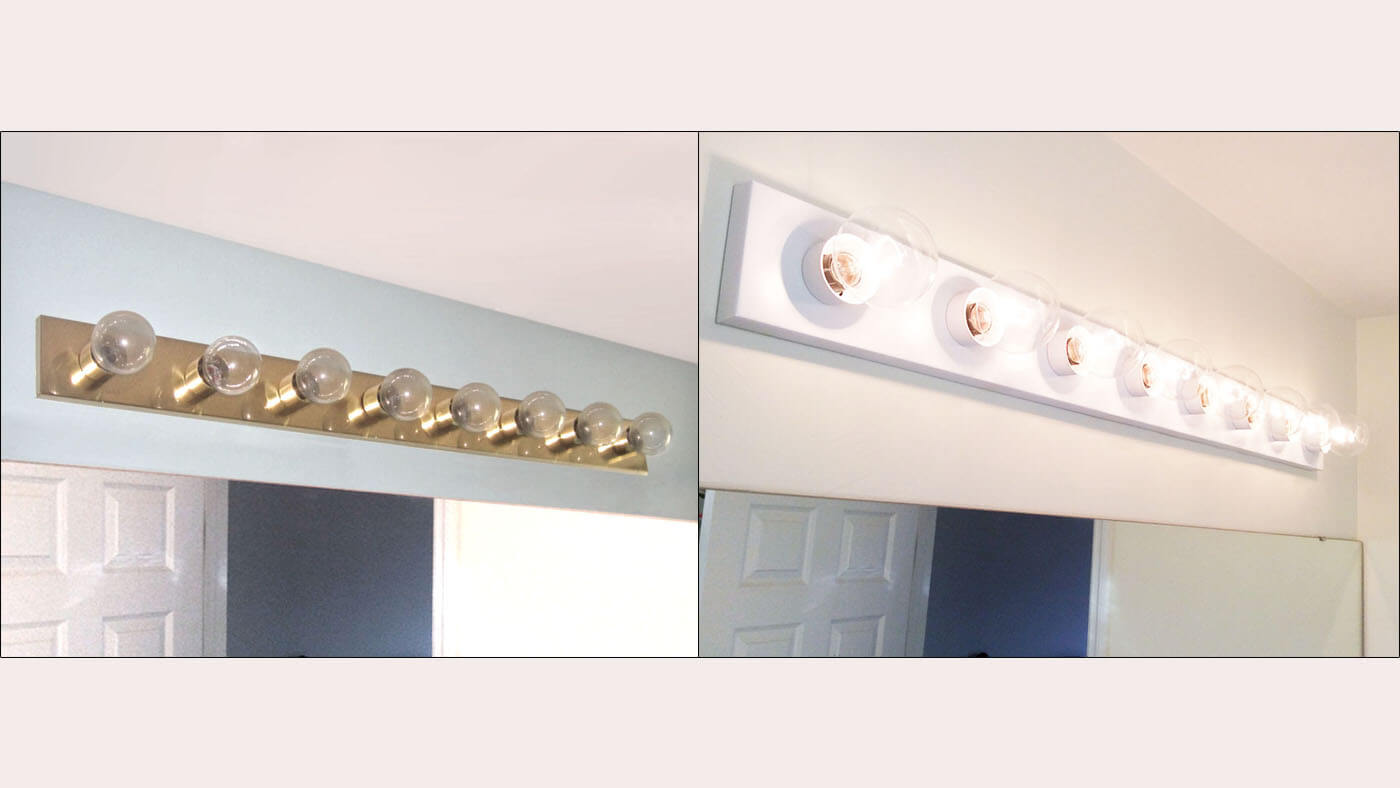
As you can see from the Before and After photos, it is well worth the effort!
Want to cover your light instead? It takes less than 10 minutes with Ezlightwraps.com 🤗
